It is important that you add audio to your Google Slides in order to make your presentation interesting and keep the audience engaged. You also don’t need to add music with lyrics because soft background music can also work wonders and add a new charm to your presentation. In this article, we are going to show you How to Add Audio to Google Slides.
Adding Audio to Google Slides
It is worth noting that adding audio to Google Slides was previously not possible as Google decided the feature was not important for some reason.
How to Fix Google Drive Video is Still Processing Error?How to Download Images from Google DocsA Layman’s Guide to Use Google Drive Video Downloader Across Multiple Platforms
However, the company has added this feature after customer feedback and we can now say that you can add audio to your Google Slides. There is still one limitation which is that you can’t add audio from your local computer directly to Google Slides. You can only attach a Google Drive audio file to your Google Slides so we will need to take one extra step of uploading the audio to Google Drive and then attaching it with Google Slides. We have seen people who like to upload their .wav files as audio recordings to their presentation and we can tell you that the file format is supported along with .mp3.
How to Add Audio to Google Slides
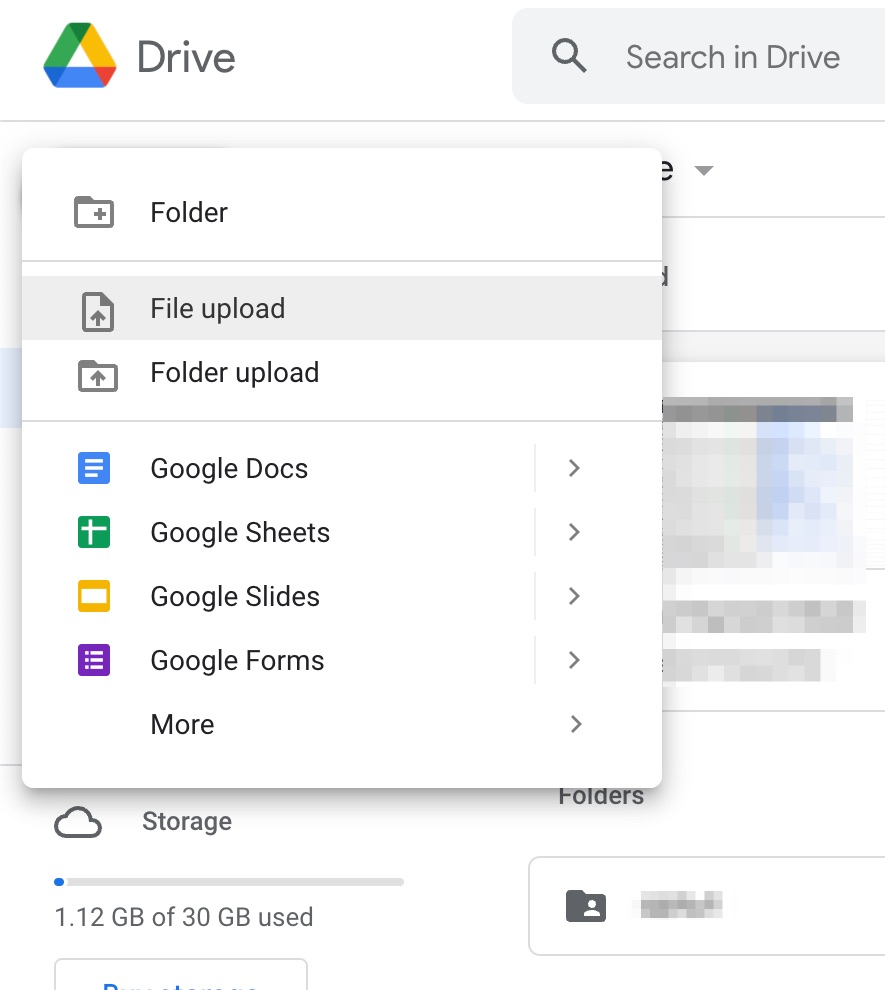
First of all, we need to upload our audio recording or audio file to Google Drive if it is not already uploaded on the platform. To upload your file to Google Drive, follow these steps:
Go to drive.google.com, and click on the “+New” button and select the File Upload option from the list.
After that, select the audio file that you want to upload from your computer and upload it to Google Drive.That’s it. The first step of uploading audio to Google Drive is completed.
Now, we need to import the audio file that we uploaded on Google Drive to our Google Slides presentation. Follow these steps to add audio to Google Slides:
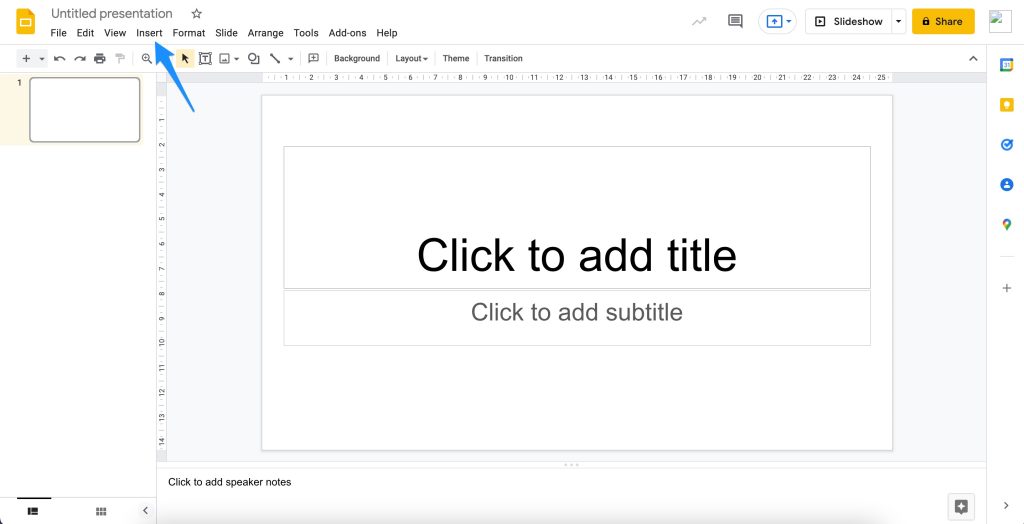
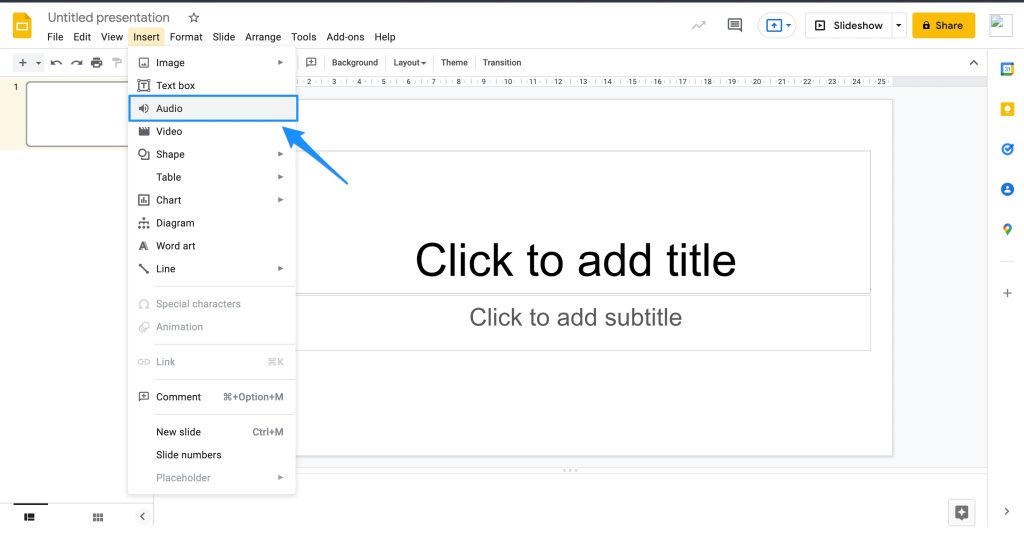
Go to slides.google.com and open your presentation. Click on Insert and select Audio from this list.
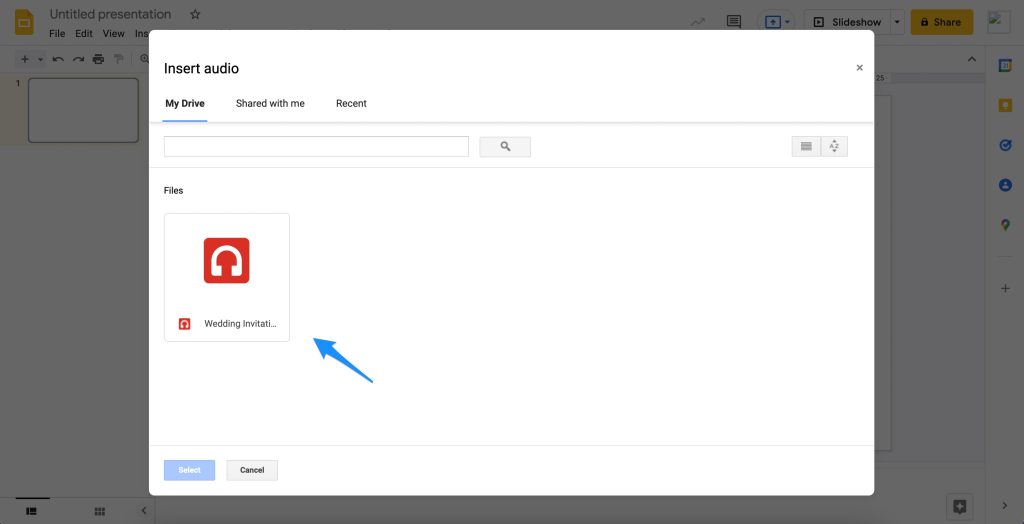
Now, you will see a box appear to add audio to your presentation.
Select the My Drive tab and pick your uploaded audio file and add it to the presentation by clicking on the Select button underneath.
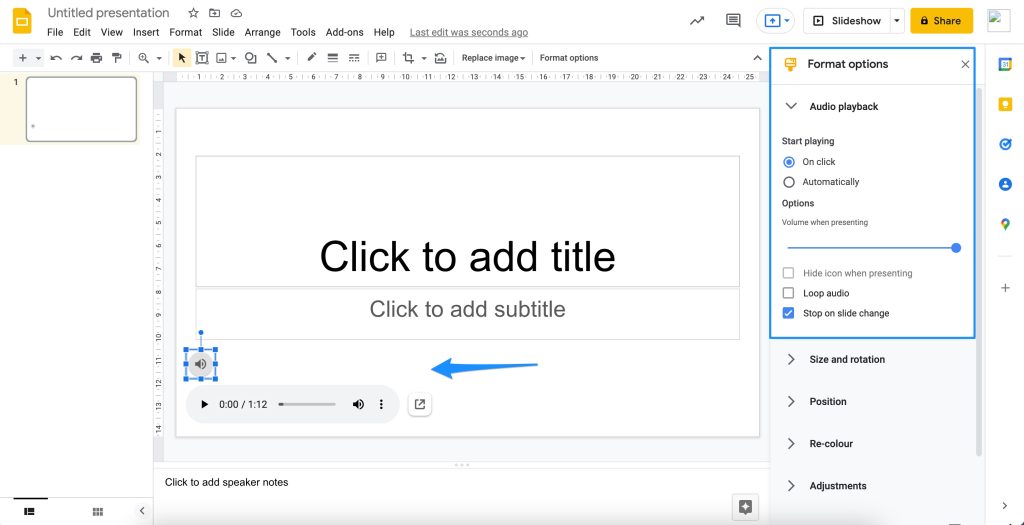
There will be a speaker icon once the audio is added and you can resize the icon as well as its position. There will be a play/pause button underneath the icon as well.
It is also possible to control the audio playback of the audio that you have added. For this, you need to click on the music icon and a “Format Options” pane appears on the right side. From here, you can expand the Audio Playback section to choose whether you want to start playing the audio “on click” or “automatically”. Underneath these options, there will be a volume slider that lets you control the volume of audio when played. You can adjust that as per your liking and preview the presentation to apply the changes. There is also the option to Hide the Icon when presenting which is what most people prefer. You can also check the Loop Audio box so that your audio keeps on looping. It is also possible to check the Stop on slide change toggle to stop playing audio when the slide changes.
Conclusion
In this article, we have mentioned all there is to know about how to add audio to Google Slides as well as what are the options that you have after adding audio to your presentation. If you feel stuck anywhere while adding audio to your Google Slides then feel free to comment below and we will try to help you with the same.
